Stripping the Fibre multi core cable:
1 - Strip the cable with cyclops around 18 Inches, and remove the black outer sheath. Snip off the braids to leave only the clear plastic sleeve.
2 - Strip the clear plastic sleeve with the bottom of the yellow strippers, to expose the individual fibre cores inside. Wipe off the protective gel with a tissue.
3 – Strip the individual fibre sleeve using the bottom of the yellow strippers, you need to expose about 4 inches of the glass. You then need to clean the glass using a lint free cloth and some cleaning alcohol. Be careful not to place the glass down or let it come into contact with anything after it’s been cleaned.
4 – DO NOT CHANGE ANY SETTINGS ON THE FIBRE CLEAVER, LEAVE THEM AS THEY ARE - Place the fibre into the cleaver and clamp down, ideally have the end of the sleeve up to the 12mm mark on the cleaver and clamp down. Fully extend the cleave arm, then push down firmly. Check the glass has been cut.
5 – Now remove the fibre from the cleaver and transfer it over to the fusion machine, clamp the fibre down into one side of the splicer just before the 2 fusion pins inside.
Stripping the fibre pigtail:
1 - Strip the tail with the middle hole on the blue strippers, only do an inch at a time or it gets stuck. Expose around 4 inches.
2 - There may still be a tiny invisible film on the glass, this can be stripped off using the smallest hole on the blue strippers. Run the stripper up the glass until its smooth.
3 – Run a splice protector over the pigtail to heat up later.
4 – Now you need to clean the glass using a lint free cloth and some cleaning alcohol. Be careful not to place the glass down or let it come into contact with anything after it’s been cleaned.
5 - Place the fibre into the cleaver and clamp down, ideally have the end of the sleeve up to the 12mm mark on the cleaver and clamp down. Fully extend the cleave arm, then push down firmly. Check the glass has been cut.
6 - Now remove the fibre from the cleaver and transfer it over to the fusion machine, clamp the fibre down into one side of the splicer just before the 2 fusion pins inside.
Splicing:
1 – Power on the splicer and check its in the correct splicing mode, It should be OK on the Auto mode, but If needs be you can set it up as the correct type of cable you have, ie OM3 / OM4 etc.
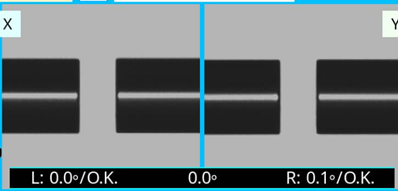
2 – Press the green play button the screen, and it should close the lid and do the splice. Check on the screen how the cleaves look, they should be a flat edge like this image:
3 – Following a successful splice, the lid will open and you can remove the spliced fibre. Now slide up the splice protecter we put on earlier, ensuring it covers the splice, and place in the oven slot at the top of the machine. Press the heat button on the machine and the oven should heat the protector and then once complete, remove the fully spliced cable.
Fluke testing:
1 – Power on the tester, enter the PIN on bitwarden, and create a job for the splice. Select who the operator is.
2 – Ensure the test is set up for the correct type of cable you are using like OM3 / OM4, and ensure you have it setup for the correct amount of joints / splices along the run so you get accurate results.
3 – When connecting up the fibre to the fluke, you need to use the Fluke test reference cables, one the main end you put leg 1 of the fibre into the `MM INPUT` port, then on the remote end you put leg 1 into the `MM OUTPUT` port. Then vice versa for leg 2. As the MM OUTPUT port is an SC end, you need to couple the fluke supplied lead to your spiced pigtail using the Fluke supplied couplers. These are in the fluke zip case.
4 – Once the cables are connected you should get this symbol in the top left of the fluke screen, meaning that the main unit can see the remote. Now run your test.
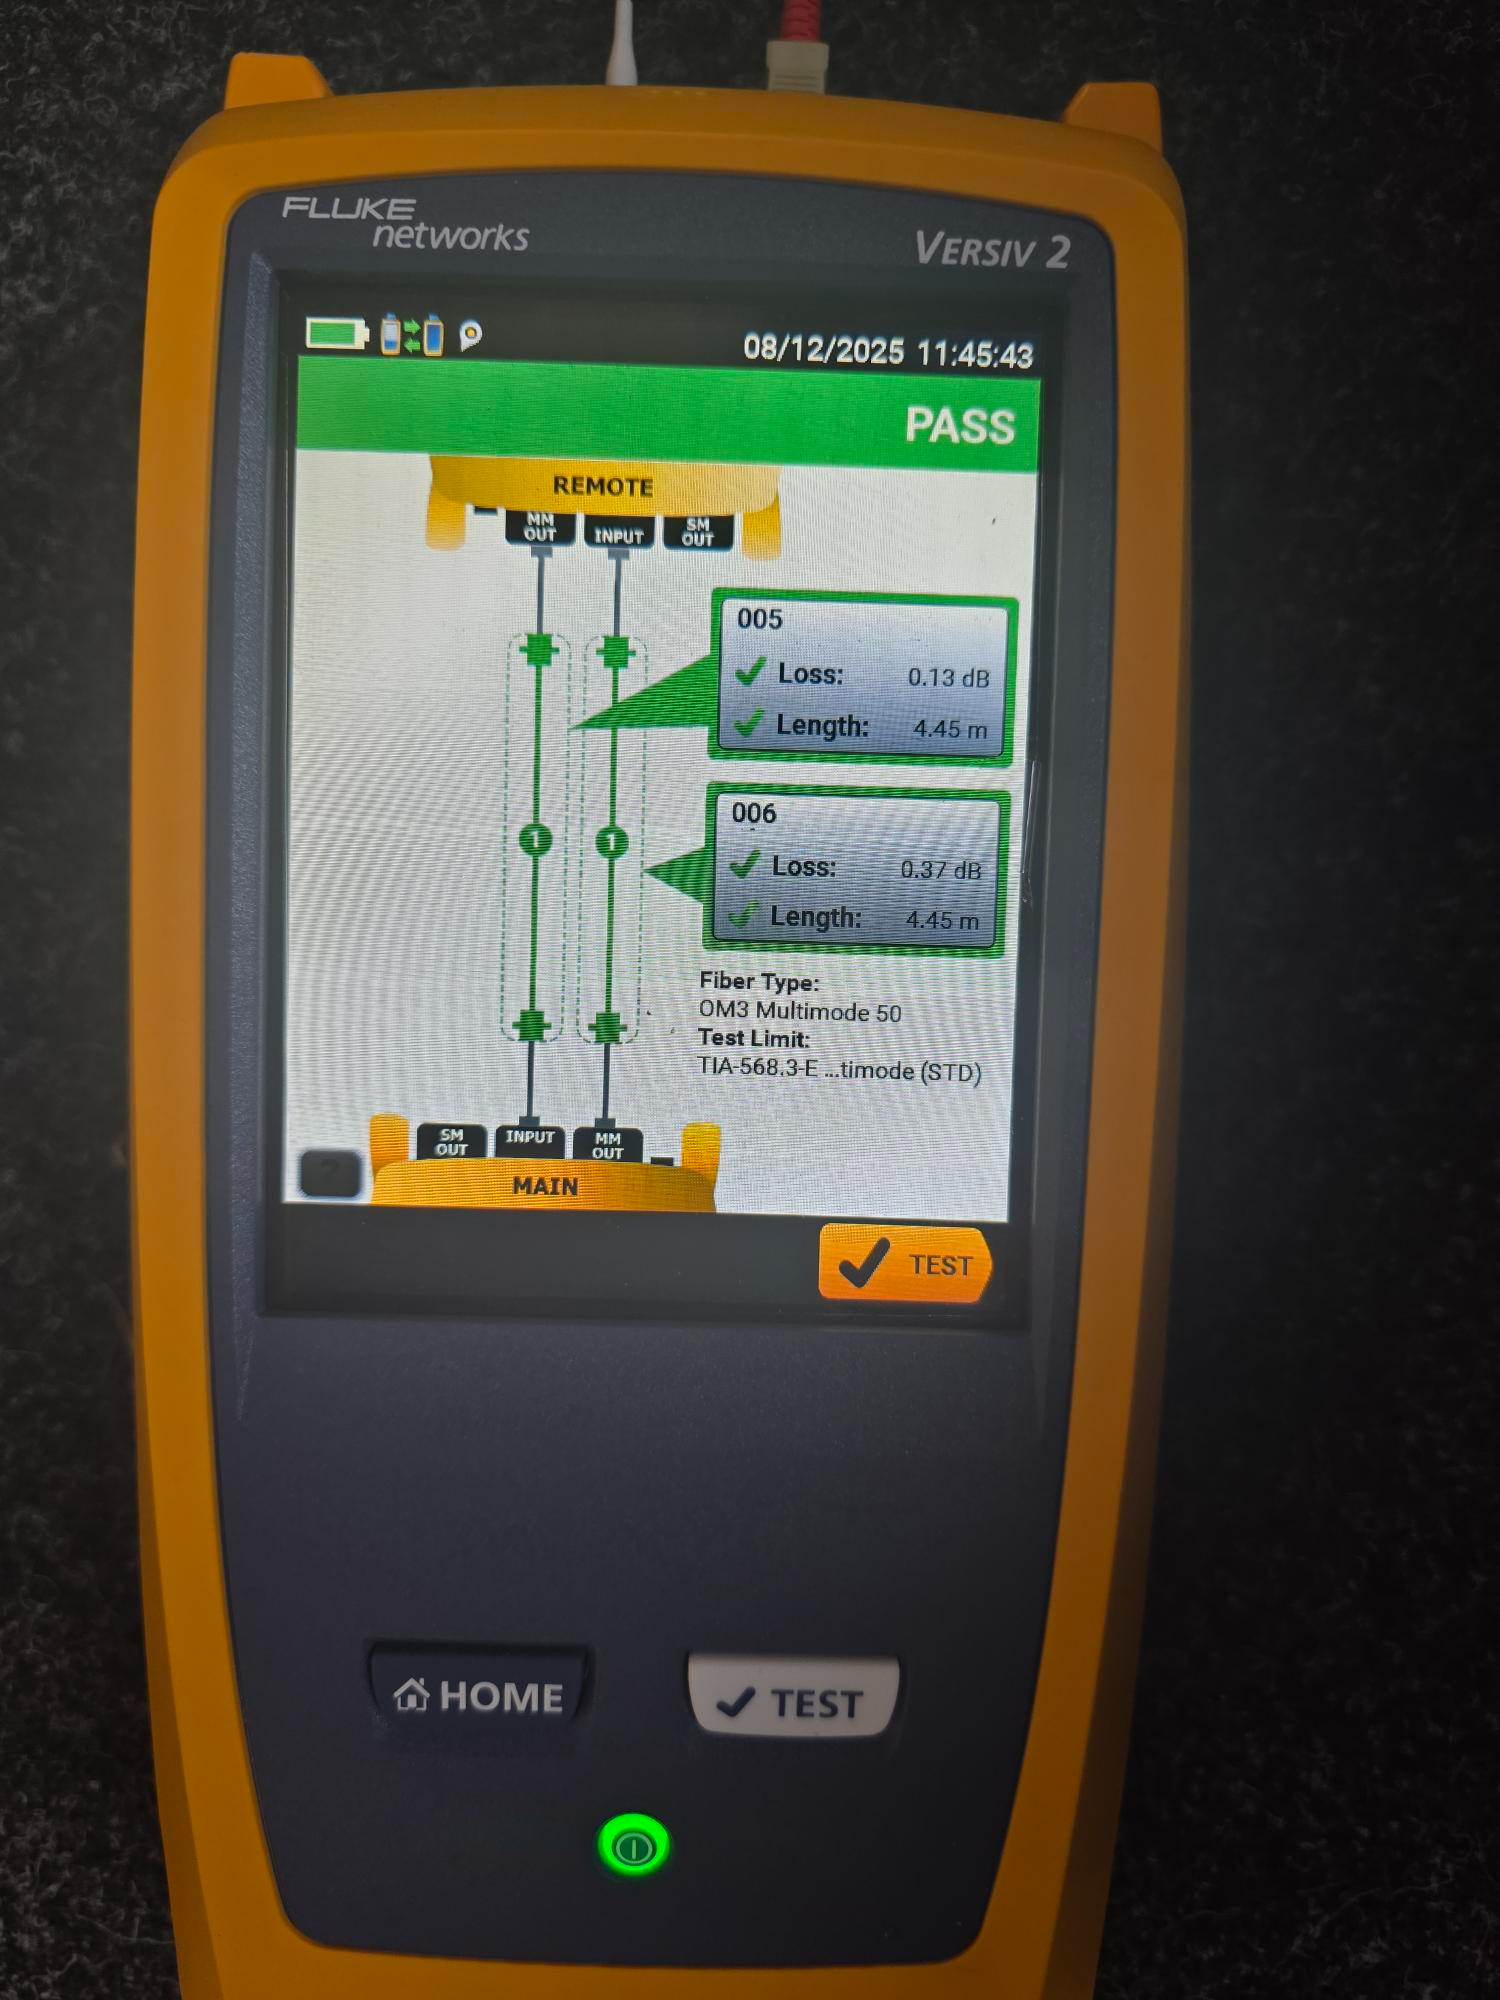
5 The image below is a successful test with one splice in the middle.
Was this article helpful?
That’s Great!
Thank you for your feedback
Sorry! We couldn't be helpful
Thank you for your feedback
Feedback sent
We appreciate your effort and will try to fix the article